Winforms - How to create a custom window with resize drag and snap features?
In this article i will describe how to create custom Winforms window, which can be resized, dragged, and snapped, providing the same experience as standard Windows window.
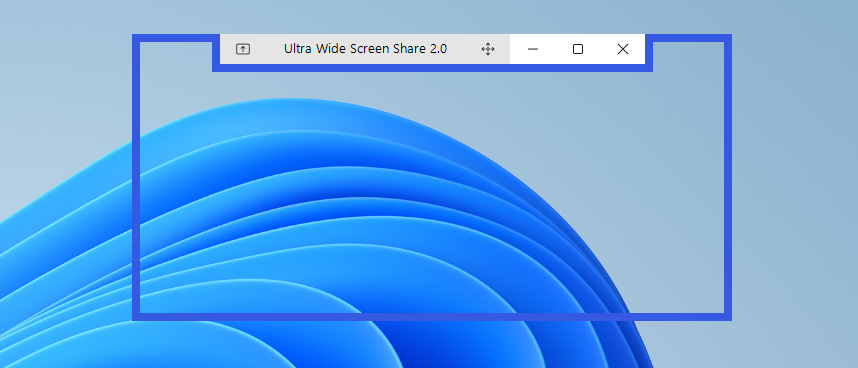
What motivates developer to create custom Winforms window is, in most cases, an application window design. Standard windows window is configurable to some extend, however not all features are supported or easy to implement. For instance, in my recent project I designed a window with title bar and navigation buttons placed inside the kind of centered “notch”.
I decided to create this article, since I didn’t find any comprehensive material covering the topic.
Table of contents
- Removing default window tittle bar and borders
- Window dragging
- Window resizing
- Window snapping to the screen edges
Removing default window tittle bar and borders
In order to design custom window we need get rid of default windows tittle bar and border. It can be done by setting Form’s FormBorderStyle property.
FormBorderStyle = FormBorderStyle.None;
FormBorderStyle.None hides the widow tittle bar and borders. Afterwards, custom tittle bar and border can be implemented and styled inside the window client area using Winforms controls.
Unfortunately, once FormBorderStyle.None is set, window loses resizing, dragging and snapping functionalities.
Let’s add it back!
Window dragging
Window dragging can be normally achieved by pressing left mouse button a on a window tittle bar, and moving the window around, as long as the button is pressed.
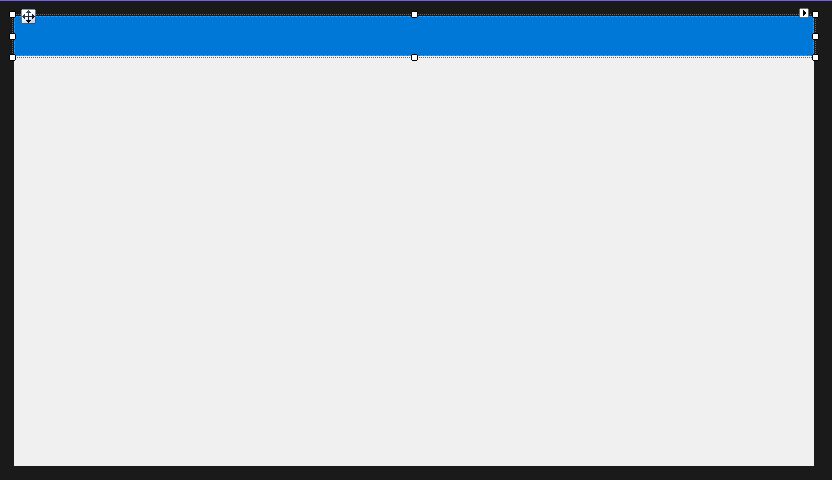
Default window tittle bar was removed by setting FormBorderStyle property. Now, let’s create a custom tittle bar, by placing a Panel control at top of the Form.
In order to detect when user left mouse button is pressed in the panel area, and start dragging the window, panel’s MouseDown event needs to be handled
const uint WM_NCLBUTTONDOWN = 0xA1;
const uint HT_CAPTION = 0x2;

private void menuPanel_MouseDown(object sender, MouseEventArgs e)
{
    if (e.Button == MouseButtons.Left)
    {
        PInvoke.ReleaseCapture();
        PInvoke.SendMessage(new HWND(Handle), WM_NCLBUTTONDOWN, new WPARAM(HT_CAPTION), new LPARAM());
    }
}
Above implementation requires a comment. ReleaseCapture and SendMessage functions are implemented in Windows native user32.dll. In order to invoke user32.dll methods in C# code, marshalling is needed.
You can use DllImport attribute to specify these functions signatures, or, as I did, make use of the Microsoft.Windows.CsWin32 nuget package, which does the marshalling for you.
ReleaseCapture
Normally the the mouse is captured by the control, after user presses mouse button over it, and released after uses releases the button. ReleaseCapture function does not wait for mouse up event, but releases the capture instantly. It is a preparation for the next step.
SendMessage
SendMessage function with WM_NCLBUTTONDOWN and HT_CAPTION arguments, is used to inform the system that mouse button was pressed over the original window title bar. Thanks to this trick, windows starts dragging action. Since the mouse button is already pressed, dragging continues as usual, until it is released by the user.

Window resizing
After applying FormBorderStyle.None style, window lost borders and the ability to use them to for resizing.
In order to bring back resizing functionality, we will try to capture WM_NCHITTEST message.WM_NCHITTEST message is sent by the system to Winforms form, whenever cursor moves or mouse button is clicked. System sends this message to the Winforms form, expecting window to respond. Winforms form response contains an information about the window element which is currently pointed by the cursor.
The plan for implementation is quite simple. Fist WM_NCHITTEST message needs to be captured. To do so, we override the WndProc method in the code-behind. Next, we check if cursor is pointing at the specific widow edge (left, right, top, bottom or corner). If that is a case, we generate the response, containing corresponding window border identifier. Thanks to this trick, windows start to behave like the original window border (which is hidden by FormBorderStyle.None) is clicked on hovered.
Following code-behind shows how to implement resizing feature for the right window edge.
const int WM_NCHITTEST = 0x0084;
const int HTRIGHT = 11;
const int BorderSize = 4;
protected override void WndProc(ref Message m)
{
    base.WndProc(ref m);

    if (m.Msg == WM_NCHITTEST)
    {
        //cursor position
        var cursorPosition = PointToClient(Cursor.Position);
        //border area
        Rectangle rightBorderRectangle  = new Rectangle(ClientSize.Width - BorderSize, 0, BorderSize, ClientSize.Height);

        if (rightBorderRectangle.Contains(cursorPosition))
            m.Result = (IntPtr)HTRIGHT;
    }
}
Implementation can be extended for other edges and corners, by using corresponding return values defined at https://learn.microsoft.com/en-us/windows/win32/inputdev/wm-nchittest
Note that
BorderSizecan be adjusted to your needs. It defines the width of the area, which will be considered as window border, given in px.

Window snapping to the screen edges
After applying FormBorderStyle.None style, window lost the ability to snap to screen edges.
In order bring this functionality back, the window style needs be adjusted, to get the original border back.
Forms’s CreateParams getter needs to be overrode, to properly style the window. WS_SIZEBOX style applies back window sizing border .
const int WS_SIZEBOX = 0x40000;
protected override CreateParams CreateParams
{
    get
    {
        var @params = base.CreateParams;
        @params.Style |= WS_SIZEBOX;
        return @params;
    }
}
More about window styles can be found at https://learn.microsoft.com/en-us/windows/win32/winmsg/window-styles
Next, by handling specific windows messages, we can prevent from drawing the original border.
The main goal of this trick is to utilize snapping functionality, which is implemented by the original window sizing boarder, but prevent from displaying the original border.
Let’s take a look at the code-behind implementation
const int WM_NCCALCSIZE = 0x0083;
const int WM_NCACTIVATE = 0x0086;
protected override void WndProc(ref Message m)
{
    if (m.Msg == WM_NCCALCSIZE)
        return;

    if (m.Msg == WM_NCACTIVATE)
        m.LParam = new IntPtr(-1);

    base.WndProc(ref m)
}
By handling WM_NCCALCSIZE and WM_NCACTIVATE messages, we can prevent from drawing the window sizing border.
WM_NCCALCSIZEmessage is sent by the system, to notify the Winforms form, that window size or position has changed. By default in Winforms application,WM_NCCALCSIZEmessage is handled byPresentationFramework. Default handler implementation checks, if widow style assumes any borders. If that is a case, window size is increased, in each direction by the value of border size, to ensure window is large enough display both client area and window border. In proposed implementation this behavior is bypassed.WM_NCACTIVATEmessage is sent by the system, to notify the Winforms form, that window has been activated or deactivated. (For instance when window lost or gets focus.) To reflect new window state, defaultWM_NCACTIVATEmessage handler tries to repaint the window tittle bar. It needs to be prevented. As per documetation. If this [lParam] parameter is set to -1, DefWindowProc does not repaint the nonclient area to reflect the state change.
Now the snapping functionality is in place.